I spent this morning creating my own light box, which took me only 30 minutes! This project is super easy to make, and the finished product works very well! I suggest using a light box for any professional photos you would like for selling items, or crafts. Stop motion videos would be amazing as well!
Things you will need:
1. A good size box
2. Two lights
3. Bristol Board (or in my case heavy drawing paper)
4. Large tracing paper
5. ruler
6. Marker
7. Scissors
8. box cutter
9. Tape
STEPS:
First: Have your box laying on its side. Use your ruler and Marker, draw cut out lines in the shape of a box on three sides on the box. Make sure there is an edge, so you can tape down your tracing paper.
Step Two: Using the box cutter, Cut along the outline you just made. Do this to all three sides of your box.
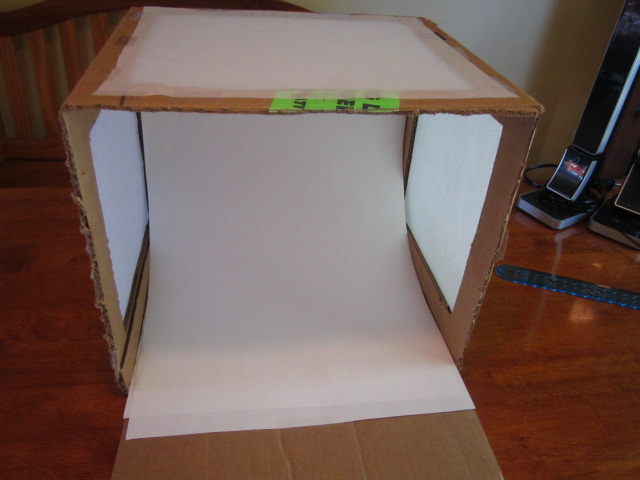
Step three: Cut off three flaps from the top of the box. Your box should look like this!
Step Four: Now to measure the backdrop for your light box. I used two heavy drawing papers to make the back. A Bristol board is preferred.
Step Five: Use your marker and mark where to cut the paper. Use your ruler and draw the line all the way down the paper. Cut down the line.
Step Six: Slide the paper into the box without creasing it! Tape the paper up at the top of the page.
Step seven: Now cover each side we cut out earlier with tracing paper. Lay down the paper and cut off the extra pieces. Tape down the paper around each edge, try to make it wrinkle free as much as possible.
Step Eight: Now position the two lights on either side of the box where you like it. Try to not get any shadows inside the box.
Now it is time to take pictures!!!
What is your secret to taking really nice pictures? How do you get the perfect lighting!


No comments:
Post a Comment